Help Guides

HOW TO PREPARE YOUR CSV FILE FOR ANALYSIS ON INSIGHT7

Say you have a csv of survey responses with various questions as columns and the responses from different users as separate rows which you want to analyze in Insight7. 

Insight7 today is built to work with qualitative data. With this in mind, let’s prepare the csv for analysis.

STEP 1: Structure your survey properly

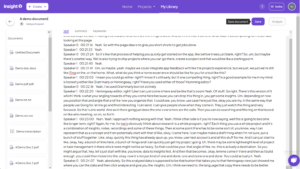
It is first important to ensure that your survey contains at least one open-ended question which is itself in a column of its own

sample_csv


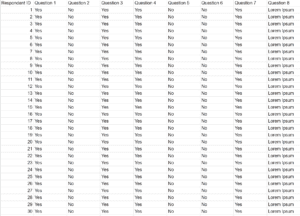
The sample survey above is a good example of a survey that can be analyzed on Insight7. There are 8 questions and although questions 1 to 7 are Yes/ No questions, Question 8 is an open-ended question that allows respondents to give answers in their own words.


STEP 2: Isolate the relevant column

The next step in preparing your csv for analysis in Insight7 is to extract the most relevant column for the analysis you want to work on

If your survey has more than one open-ended question, you would need to decide which column is most relevant to the exact analysis you want to do at the moment. 

For my sample project above, I have only one open-ended question (column 8) and it’s relevant for my project analysis. I would go ahead to extract that by copying it into a new csv.


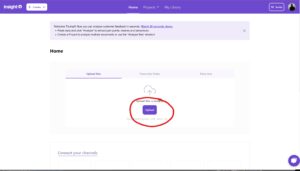
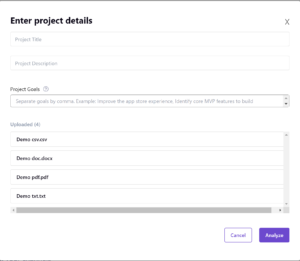
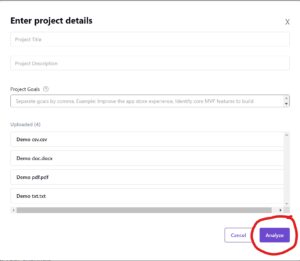
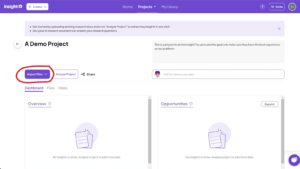
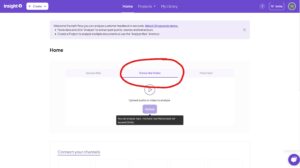
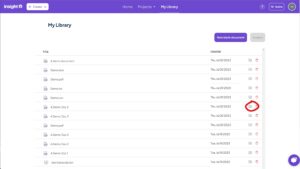
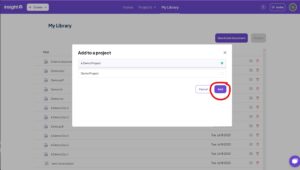
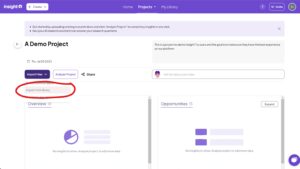
Now that I’ve extracted the relevant column, I can save it and upload into Insight7 for analysis. 

If you have any questions about this, contact us at cs@insight7.io and we would be sure to provide you any assistance you may need. 

Enjoy!

HOW TO ANALYZE PROJECTS IN INSIGHT7:

Insight7 has two basic approaches for creating new projects and analyzing. Both approaches are discussed in this article. 


APPROACH 1: DIRECTLY FROM THE HOME PAGE

This approach is most suitable when all the documents, transcripts and survey documents for the project are readily available and you want to analyze them immediately. This approach is mostly used when all the user data has been collected and it’s time to analyze. 

STEP 1: Click “Upload” on the home page under the “Upload files” tab

This button would open up your file explorer and ask you to select the files you wish to upload. Select all files relevant to your project in .pdf, .docs, .txt and/ or .csv formats. Remember your csv must be properly formatted for best results. Find out how to prepare your csv for analysis on Insight7 in the “How to Prepare your CSV File for Analysis on Insight7” article.


STEP 2: Give your project a title and description

Every project has its goals and what needs to be accomplished by the analysis. It is important to give this information so as to get the most relevant result for your specific use case and addressing your unique goals. 

You also need to give your project a unique title so you can easily locate and reference it in future.


STEP 3: Analyze the project!

When the relevant context has been given and the project appropriately titled, hit the analyze button and let the magic happen!


STEP 4: Success!


APPROACH 2: From the Create Menu

This approach is used when data for the project is not readily available. When you’re still gathering the data for a project and you’re not ready to analyze yet, Insight7 can be a good place to store the datasets until a time when you’re done collecting and are ready to analyze. 


STEP 1: Click on the ”Create” Button and select the “Create New Project” option

The “Create” button comes with various options for you to choose from. In this case, you want to select the “Create new project” option. This option would take you to a blank project page.


STEP 2: Give your project a title and description

As before, you want to give your project a unique title for identification and future reference. You also want to give it a description for context so you get the most relevant insights for your use case. When you’ve done that you click the “Save” button and your project has been created.

When the project is created, you can click the “Import Files” button to include feedback datasets to the project which you can choose to analyze later. These datasets would be found under the “Files” folder.

HOW TO ANALYZE DOCUMENTS IN INSIGHT7:

Just like in the case of projects, Insight7 has two approaches to analyzing documents. 


APPROACH 1: Directly from the home page

STEP 1: Navigate to the “Paste Text” tab on the home screen

When you select the “Paste Text” tab, you can paste or type in the data content (either notes or transcripts).


STEP 2: Click “Analyze

When you’ve inputted the text you want to analyze, you simply click “Analyze” and Insight7 would pull out all the pain points, desires and behaviors from the data.

STEP 3: Success!


APPROACH 2: From the Create Menu

STEP 1: Click the “Create” button and select the “Create blank document” option

The “Create” button comes with various options for you to choose from. In this case, you want to select the “Create blank document” option. This option would take you to a blank document.


STEP 2: Type or paste in the text to be analyzed

In the space provided, type in or paste the text you wish to analyze for insights.


STEP 3: Give your document a title and save

You want to give your document a unique title for easy identification and reference. After that, click the “Save” button. You would get a notification letting you know that your document has been saved successfully.


STEP 4: Click “Analyze”

After saving your document, you can go ahead and click analyze to immediately pull out the insights in the document or you could leave it saved in your Library for further work before analysis.

HOW TO TRANSCRIBE VIDEO/ AUDIO CALLS AND ANALYZE THEIR TRANSCRIPTS IN INSIGHT7

Insight7 can help you synthesize insights from your video or audio calls in .mp4, .mp3 and .wav formats. Once again, there are two approaches to this.


APPROACH 1: Directly from the home screen

STEP 1: Navigate to the “Transcribe Video” tab and click “Upload”

On the home screen, navigate to the “Transcribe Video” tab and click on the “Upload” button. This takes you into your Insight7 Library and opens up your computer’s file explorer allowing you to select the call file you want to transcribe and analyze for insights.

STEP 2: Name the file and upload

Give your file a unique name for easy reference and identification. After which, click on the “Upload” button to begin the upload process.

STEP 3: Transcribe

When the upload is done, click the “Transcribe” button to begin the transcription. As soon as your transcript is ready, you would be notified on the app and by email.

STEP 4: Analyze

When your transcript has been returned, click the “Analyze” button to get the pain points, desires and behaviors expressed in your transcript. 


APPROACH 2: From the Create Menu

STEP 1: Click on the ”Create” Button and select the “Upload from computer” option

The “Create” button comes with various options for you to choose from. In this case, you want to go to the “Transcribe video or audio” and click “Upload from computer”. This takes you into your Insight7 Library and opens up your computer’s file explorer allowing you to select the call file you want to transcribe and analyze for insights.

Repeat steps 2 – 4 above

HOW TO ADD A DOC FROM YOUR LIBRARY TO A PROJECT

Say you have a document in your library that you want to include in a project that you’ve analyzed. Insight7 has two approaches for you to accomplish this. 


APPROACH 1: From the Library section

STEP 1: Go to your Library

Click ”My Library” in the top nav bar. This would take you to your library section where you would see all the documents, surveys, video or audio files you’ve uploaded to Insight7.


STEP 2: Find the document you want to add to your project

Look through the files in your library and find the project you want to add to a project. Click on the folder icon beside it. A modal would come up showing you all the projects you have in Insight7. 


STEP 3: Choose the folder you want to add the document to

Select the project you want to add the document to and click “Add”. A notification would let you know that your document has been successfully added to the project.

This document would appear in the chosen projects files tab and you can analyze it along with other files in there for updated insights.


APPROACH 2: From the Project itself 

With this approach, you can add multiple documents to a project at once.


STEP 1: Navigate to the project you want to add a document to 

Click “Projects” in the top nav bar and select “My Projects” from the drop down. Find the project you want to add to and open it.

STEP 2: Click the “Import Files” button and select the “Import from library” option

In the project, click on the “Import Files” button and in the drop down, select the “Import from library” option.


STEP 3: Add to the project

A modal would pop-up showing all the files in your library. Select the file or files you want to add to the project and click on “Add”

A notification banner would let you know that the file was added successfully and you would find the file in the projects files tab.